I found that it is not easy for the beginners to setup Selenium RC and run the GoogleTest.java example after downloading it from www.openqa.org . The purpose of this post is to help beginners (new users to Selenium RC) help setting up Selenium RC with TestNG using Eclipse.
This assumes that you have done the following steps.
Download and install Eclipse (www.eclipse.org)
Download the latest TestNG (www.testng.org)
Download Selenium RC (www.openqa.org)
Install TestNG plugin for eclipse (http://testng.org/doc/download.html)
Please follow the step by step instructions to setup the test environment.
Launch Eclipse, you can setup any directory as your default workspace. For this example, my default workspace is as shown below.

Click OK, Eclipse will be launched.
Click File > New

Set the project name as Google.

Click Next.
On the Source tab leave the default.
Click on Libraries.
Click on Add External Jars
Add the jar files for TestNG and Selenium RC Java client as shown below.

Click Finish, now you will have a Java project created in Eclipse that is correctly set to use Selenium Client and TestNG jar files.
Now Right Click on the src > New > Class

Name the class file as GoogleTest and Click Finish.
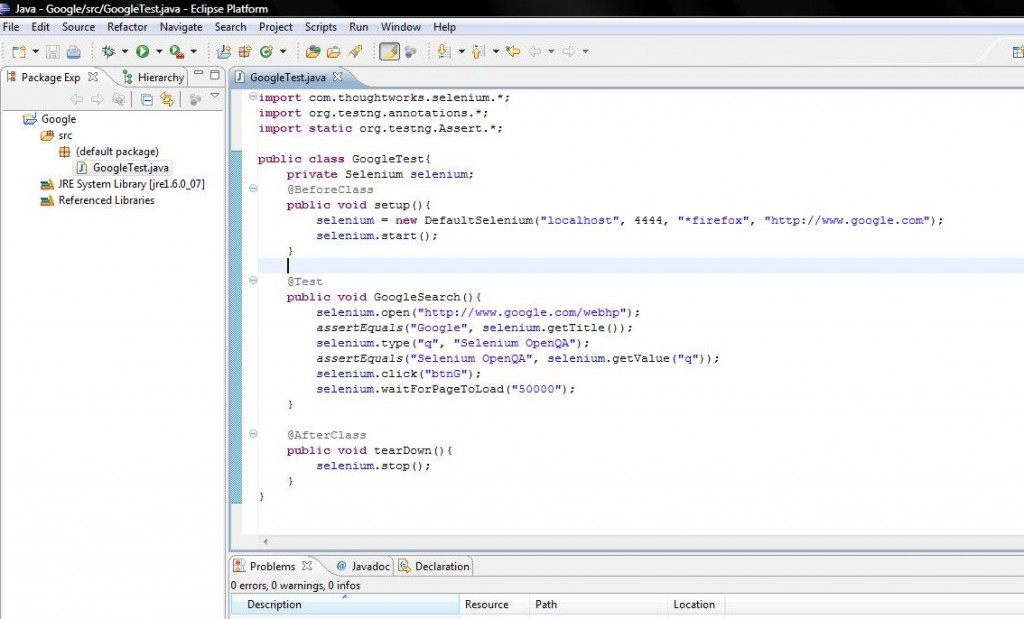
Now create a testng test within GoogleTest class as follows.
The next step is to run the Selenium Server as

Now Right Click on the test and run this as TestNG test.

The test will be successful.
